简体 | 繁體 | FastenerExpo |

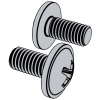
Cross recessed round head screws

ASME B 18.6.3 (T36-I/T36-IA) - 2013

Display drawing:

美标ASME B18.6.3 (T36-I/T36-IA) - 2013 ASM Cross recessed round head screws
Thread Size
d
0# 1# 2# 3# 4# 5# 6# 8# 10#
d
PP
Socket No.
M1 Ref.
M2 Ref.
P Type I max
min
Type IA max
min
dk max
min
k max
min
0.0600 0.0730 0.0860 0.0990 0.1120 0.1250 0.1380 0.1640 0.1900
80 64 56 48 40 40 32 32 24
0 0 1 1 1 2 2 2 2
0.066 0.075 0.093 0.102 0.111 0.147 0.155 0.171 0.188
/ / 0.092 / 0.110 0.142 0.150 0.164 0.182
0.035 0.045 0.046 0.055 0.065 0.063 0.073 0.090 0.108
0.015 0.026 0.027 0.035 0.046 0.035 0.045 0.064 0.082
/ / 0.047 / 0.067 0.063 0.071 0.086 0.105
/ / 0.031 / 0.051 0.045 0.053 0.068 0.087
0.113 0.138 0.162 0.187 0.211 0.236 0.260 0.309 0.359
0.099 0.122 0.146 0.169 0.193 0.217 0.240 0.287 0.334
0.053 0.061 0.069 0.078 0.086 0.095 0.103 0.120 0.137
0.043 0.051 0.059 0.067 0.075 0.083 0.091 0.107 0.123
Thread Size
d
12# 1/4 5/16 3/8 7/16 1/2 9/16 5/8 3/4
d
PP
Socket No.
M1 Ref.
M2 Ref.
P Type I max
min
Type IA max
min
dk max
min
k max
min
0.2160 0.2500 0.3125 0.3750 0.4375 0.5000 0.5625 0.6250 0.7500
24 20 18 16 14 13 12 11 10
3 3 3 4 4 4 4 5 5
0.242 0.261 0.301 0.380 0.395 0.409 0.447 0.542 0.642
0.234 0.255 0.291 0.368 / / / / /
0.108 0.130 0.170 0.208 0.221 0.236 0.272 0.285 0.385
0.082 0.104 0.144 0.182 0.196 0.211 0.245 0.244 0.346
0.103 0.126 0.162 0.195 / / / / /
0.085 0.108 0.144 0.177 / / / / /
0.408 0.472 0.590 0.708 0.750 0.813 0.938 1.000 1.250
0.382 0.443 0.557 0.670 0.707 0.766 0.887 0.944 1.185
0.153 0.175 0.216 0.256 0.328 0.355 0.410 0.438 0.547
0.139 0.160 0.198 0.237 0.307 0.332 0.385 0.411 0.516
①,Where specifying nominal size in decimals, zeros preceding the decimal and in the fourth decimal place shall be omitted.
②,Square recesses incorporate a slight taper on the sides of the recess. This taper can result in loss of penetration gaging depth on finished fasteners due to the buildup of plating in the recesses. The recess penetration dimensions specified here are for finished (plated ) product. Manufacturers should be advised that they should not use all this tolerance in the heading process, or an out-of-tolerance condition could exist after plating.